by Jacqueline Gikow
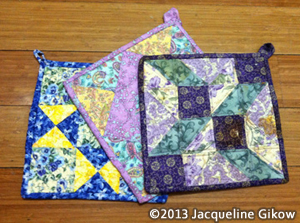
Instructions are provided below for making a quilted potholder.
Quilting is a sewing craft that whose origins were as old as ancient Egypt and China. Layering three pieces of fabric together and sewing them to prevent the center layer from sliding away from the outer layers accomplished it.
In the eleventh century, quilting was employed to keep the padding together under knight’s armor.
In the eighteenth century, it was fashionable for English women to put on quilted underskirts and for men to dress in quilted jackets. It was also common to make quilted bed covers. Quilts were imported to the American Colonies in the eighteenth century.
All through history, people have used quilts for numerous reasons. Quilts can supply links to the past. Quilts also offer warmth. Quilts afford beauty, value and history. Quilts also supply pleasure through the act of crafting with colors, surfaces, and patterns.
A kitchen can never have enough potholders. How many times have you stood in before a burning-hot pot, wanting to take it off the stovetop, without a potholder in sight? This quilted potholder will shield your hands and is a great way to get rid of fabric scraps. Making a quilted potholder is also a way to start doing patchwork and quilting without being obligated to making a whole quilt.
1 - 9” x 9” raw quilt block (you can find quilting patterns on the Internet)
1 - 9” x9” square of quilt fabric for the backing
1 - 2.75” length of quilt fabric, cut on the bias (or a minimum of 39” long) for the binding
Thread to match the edging
1 - 9” x 9” square of cotton quilt batting
1 - 9” x 9” square of Insulation
1. Stack the fabric in this order: a) back (right side down), b) insulation, c) quilt batting, d) quilt block (right side up).
Pin the layers together so that the layers of insulation don’t move during the quilting step. Quilt the layers together either by hand or sewing machine. Cut the quilt square to 8.5” x 8.5”
3. Sew from the corner with a 3/8” seam. Repeat this procedure for the following three edges.
4. Before you stitch to the final corner, make a loop of the binding and clip the edging at an angle. Overlap the start of the strip by 1/2”. Fold the binding edge under the beginning edge and pin it so it is covered.
Sew until the stitches partly cover the binding and trim the corner to eliminate excess. Iron the binding away from the center.
5. Stitch the binding to the back by hand to complete the potholder The process is to fold the binding to the potholder back and use a straight pin to keep it in place.
Whipstitch the edging to the back. Knot the end of the thread and pass the needle into the corner of the potholder where the binding will hide it. Pass the needle through the binding edge. Iron the binding to the back of the potholder and place the needle through the binding.
Whipstitch until you reach the seam. Continue whipstitching until you approach the corner. When you’re about 3/8” inches away from the edge, discontinue stitching and iron the binding down. Fold the binding up to create a sharp corner.
When the binding sewn to the potholder, make a knot near the edge and conceal the end of the thread.
Related
Make a Soft Stuffed Scultpure | Painting on Fabric | Fabric Painting on Silk
![]() How To Make Diamond-shaped Earrings Out Of Beads
How To Make Diamond-shaped Earrings Out Of Beads
How to make diamond-shaped earrings out of beads using a Brick Stitch.
![]() How to Create a Bracelet with a Sliding Clasp
How to Create a Bracelet with a Sliding Clasp
Tutorial that shows you how to create a square knot sliding clasp for jewelry.
![]() How To Make A Dream Catcher For A Child
How To Make A Dream Catcher For A Child
Step-by-step instructions for how to make a Dream Catcher.
![]() Create a Fun Flower-Pot out of a Plastic Cup
Create a Fun Flower-Pot out of a Plastic Cup
A fun flower-pot project great with or without children.
![]() How To Make A Plastic Bottle Bird House
How To Make A Plastic Bottle Bird House
A simple bird house using a plastic bottle that costs next to nothing to make.