by Carly Van Heerden
Dream Catchers are essentially tools used by the Native American Indians. But these are not tools that you would use to fix a car, window or faucet; they are tools used to fix problems that start out in the dream world.
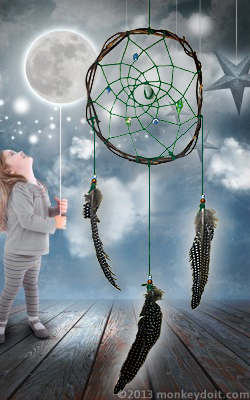
Dream Catchers were made to be hung around the home and serve as webs to catch bad dreams, feelings, energies or entities. They are usually hung alongside a window so that pure light from the morning sunshine can cleanse the crystal that hangs in their center. Crystals are known to have the ability to transform negative energy into positive energy.
Simply put - the bad dreams come out of us as we sleep, in the form of energy. This energy then gets caught in the web of the Dream Catcher and the crystal in the center, like a spider, eats the energy (converts it, cleanses it and transforms it into positive energy), and then the rays of sunshine push the now clean energy back out into the room.
The feathers on a Dream Catcher are usually those of a bird of prey, raptor, or even a crow or raven. The eagle and some other raptors are seen as spiritual guides that can watch over us on this plane, and ravens and crows are seen as messengers.
Now that you have a brief understanding of what a Dream Catcher is, you may want to know how to make one yourself. For the purpose of this article we will be making a Dream Catcher for a child’s room. In most cases strips of leather, pure crystals and raptor or raven feathers are used. The purpose of this Dream Catcher will be the same, but we will be making it bright and colorful and will use other materials. We want the child to believe in the beautiful magic of their very own Dream Catcher, so of course it must look appealing and magical to the child. Remember, intention is everything!
1. 1 x ball of wool - your choice of color
2. 1.5 meter/60 inches long vine, rolled into a ring/circle as seen in the materials image
3. Beads of your choice - be sure they have big holes for the wool to push through
4. A crystal or other gemstone
5. 6 to 9 feathers of your choice
6. Scissors
1. Make a ring/circle from your vine. Make it the size you want it to be. You can allow the vine to dry if you like (which may take two to three days) or you can begin to make your Dream Catcher while the vine is still green.
2. Cut a 3 meter/78 inches long (depending on the size of your ring) piece of wool from your ball of wool. You will need to push your ‘wool supply’ through a few tight gaps, so you will need to keep the size of your ‘wool supply’ ball small.
3. Tie one end of the wool tightly to the vine ring, at any point along the ring.
4. Pull the wool across to the side (about 5 to 7 cm/2 to 4 inches) and then loop it over the vine, then pull it back towards you by pushing it between the vine and the wool. This will create your first segment.
5. Pull the wool to the side again and repeat the process above until you have short segments of wool all the way around your ring.

6. Once you have completed your first row, you will pull the wool to the side again but this time you will loop it around each segment of your first layer of wool, as seen in the image below.
Remember to use your fingers to hold the wool taut, but not too tightly or you will bend your vine.
7. From here you can continue moving around in a spiral, looping your wool through each next segment of wool until you have a web as seen in the image below.
8. Once you reach the center of your web, leave a small opening in the center then tie the wool to itself. Your web should be ‘springy’ and complete.
9. Fasten your crystal or other gemstone to a piece of wool and then tie it to the center of the Dream Catcher as seen below.
10. Thread a short piece of wool through each bead (or thread if the wool is too thick to fit through the bead holes) and then fasten the beads randomly onto your Dream Catcher web, to look like bugs in the web. You should use pretty beads, perhaps sea life, butterflies or little fairies that will inspire children.
11. Cut three pieces of wool and then tie them to your Dream Catcher along the bottom, so that they form somewhat of a triangle. Tie a piece either side of the ring and then one at the bottom directly between your side ‘strings’. These will be for your feathers.
12. Begin with the bottom string - it should be the longest with the two either side being of the same length as each other, yet shorter than the bottom string. Thread two (or more) large-holed beads through the string then tie two of your feathers securely to the end of the string.
13. Once the feathers are secure push the beads over the ends/quills of the feathers. The beads will act as weights pulling the feathers downward.

14. Repeat the above two steps with the shorter pieces of wool on either side of the ring of the Dream Catcher.
15. Tie a piece of wool dead-center on top of the ring which will attach your Dream Catcher to your ceiling (on a hook, curtain rail or the like).
16. Finally, hang your Dream Catcher in the room, somewhere you are sure receives morning sunshine.
This project is not too easy, but it certainly is a lot of fun. Older children can make Dream Catchers on their own, whereas younger children will probably need another pair of hands. All you need to remember is that when it comes to making Dream Catchers for the first time - practice makes perfect! Very few people get a perfect web first time around. Considering that a ball of wool costs only 50c and vine costs nothing, you can afford to make as many mistakes as you need to, until you get it right!
Once you’ve mastered the web there are so many odds and ends you can add to your Dream Catcher. They make great gifts for friends and can obviously be made in all shapes and sizes.
Pleasant dreams!
Related Articles
![]() How To Make Diamond-shaped Earrings Out Of Beads
How To Make Diamond-shaped Earrings Out Of Beads
How to make diamond-shaped earrings out of beads using a Brick Stitch.
![]() How to Create a Bracelet with a Sliding Clasp
How to Create a Bracelet with a Sliding Clasp
Tutorial that shows you how to create a square knot sliding clasp for jewelry.
![]() How To Make A Dream Catcher For A Child
How To Make A Dream Catcher For A Child
Step-by-step instructions for how to make a Dream Catcher.
![]() Create a Fun Flower-Pot out of a Plastic Cup
Create a Fun Flower-Pot out of a Plastic Cup
A fun flower-pot project great with or without children.
![]() How To Make A Plastic Bottle Bird House
How To Make A Plastic Bottle Bird House
A simple bird house using a plastic bottle that costs next to nothing to make.