- MONKEYDOIT LINKS
- Home
- Beading & Jewelry Making
- Clay Basics
- Fun Paper Crafts
- Home Decor
- Projects with Fabric
- Easy Crafts For Kids
- Arts & Crafts Ideas
- Search
- OTHER SITES
- Sleewee
- Worklooker
- Jobspector
How to Create a Bracelet with a Sliding Clasp
by Hollie Strack
 |
 |
There are many ways to create a closure or clasp for jewelry. One of the easiest and most popular is a sliding clasp. By looking at a sliding clasp, one would think it was extremely difficult to create, but they are actually really simple. That is, as long as you have basic micro-macramé skills. There are several different types of sliding clasp knots as well. For the purposes of this tutorial we are going to create a square knot sliding clasp.
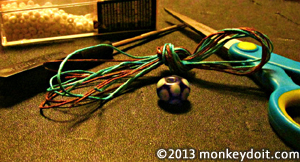
Materials Needed to Make a Bracelet with a Sliding Clasp
- Hemp cord
(.5 or 1 mm is preferable)
- Beads
- Bead reamer
- Scissors
- Fabric glue
Steps for Making a Bracelet with a Sliding Clasp
Step 1:
Cut hemp to desired length. For this project you will need 4 pieces of hemp total. You will need 2 for knotting, one holding cord, and one for the sliding knot. Remember your knotting cords need to be at least 5 times the length of the finished product. The length of the holding cord should be the length of the bracelet plus 4-6 inches. The sliding knot cord needs to be approximately 8-10 inches long.
Step 2:
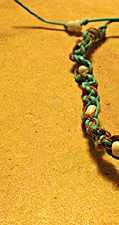
Create 10 spiral knots then add a small bead (I am using seed beads), repeat this two more times.
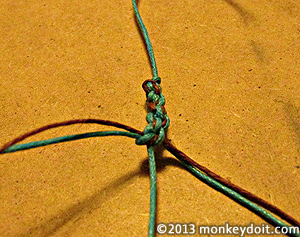
Step 3:
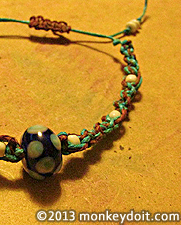
After the last bead, create 2 spiral knots, add the decorative bead, then create 2 more spiral knots.
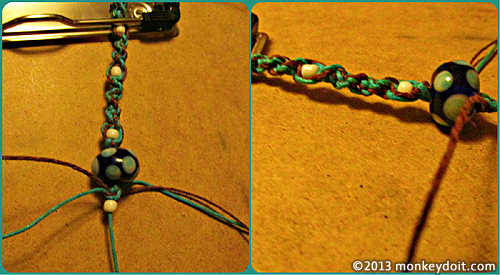
Step 4:
After the 2 spiral knots add another small bead, then repeat what you did on the first half.
Step 5:
Make an overhand knot when you have finished with the spiral knots. Then cut the excess from your knotting cords. Make sure you do not cut the holding cord as this will serve as part of the sliding clasp.
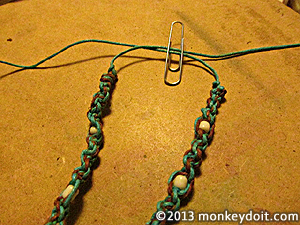
Step 6:
Cross the holding knots over one another, use a paper clip to secure them in place.
Step 7:
Grab your last piece of hemp and create four square knots around the holding knots with the paper clip on them.
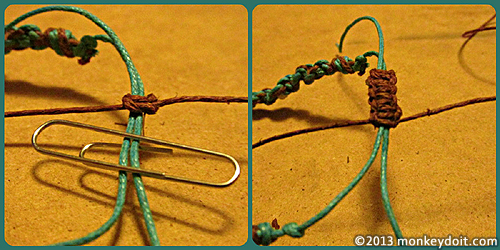
Step 8:
Tie an overhand knot very close to the square knots, and clip off the remaining string. Again, do not clip the holding cords.
Step 9:
Tie an overhand knot about 1.5 inches from the end of each of the holding cords.
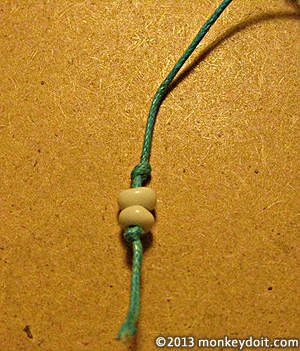
Step 10:
Add 2-3 small beads or 1 large bead to each of the holding cords, and tie another overhand knot.
After you have finished with this bracelet, you can add a very small amount of fabric or craft glue to the knotting cords that were cut short earlier in this tutorial. Be sure not to get any on the holding cords as it will glue them together and the sliding clasp will not work.
Good Luck & Happy Crafting!
Related pages
How to Create a Beautiful Hemp Friendship Bracelet | How to Make Overhand & Square Knots