by Joanna Ochocinska

This is one of my favourite Christmas projects. The final product looks fantastic and really stands out from all the other 'regular' Christmas tree decorations. The key to success is the choice of colours that complement each other, don't blend in with the tree but also give the snowflake that frosty look. I used size 10 seed and bugle beads with a very thin 0.3mm jewellery wire, which will probably result in me having to buy a pair of stronger glasses. I'm sure the snowflake would look just as good if I used larger beads. Plus, I would actually be able to see it with my own eyes. If you do stick to small beads and thin wire, be very careful not to snap it when bending it and pushing it back and forth.
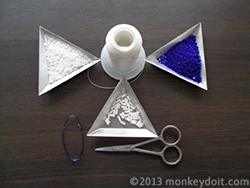
1. Small seed beads
2. Large seed beads
3. Bugle beads
4. Approximately 1.5m of 0.3mm wire
5. Scissors
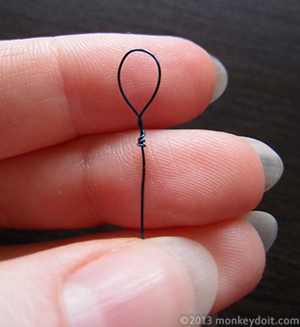
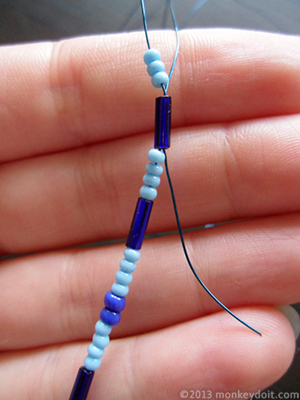
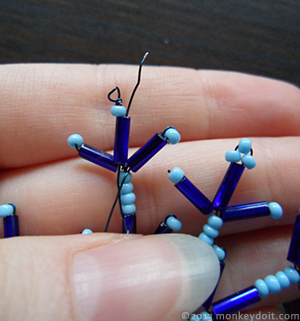
1. Shape one end of the wire into a loop.
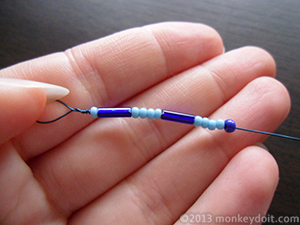
2. Slide the following sequence of beads down to the loop: one small seed bead, one bugle bead, four small seed beads, one bugle bead, four small seed beads and one larger seed bead.
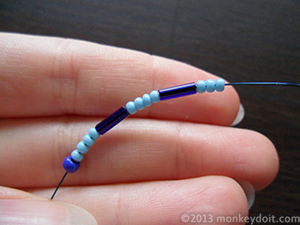
3. String the same sequence of beads in reverse with three small seed beads at the end instead of just one.
4. Push the wire back through the last bugle bead.
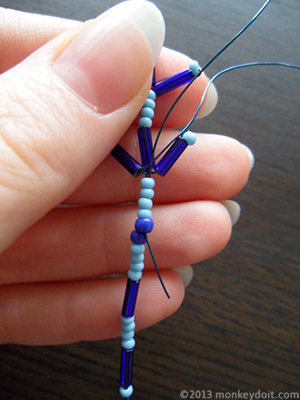
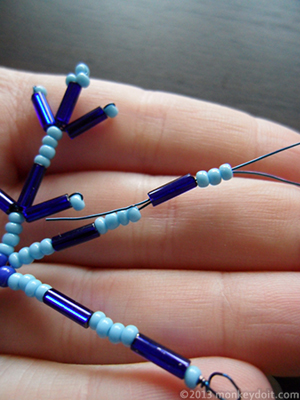
5. Slip one bugle bead and one small bead onto the wire.

6. Go back through the bugle bead.
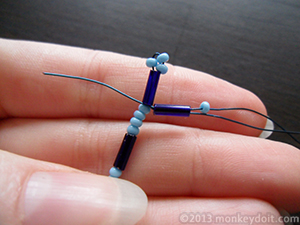
7. Wrap the wire around the 'arm' of the snowflake once and repeat steps 5-6 on the opposite side.
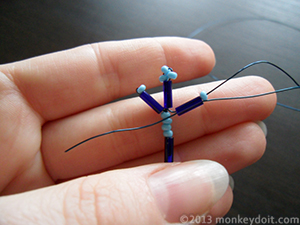
8. Slide the wire down through the small seed beads and the next bugle bead.
9. Repeat steps 5-7 at the base of the bugle bead.
10. Push the wire towards the centre so that you come out in between the large seed beads.
11. Wrap the wire around a few times.

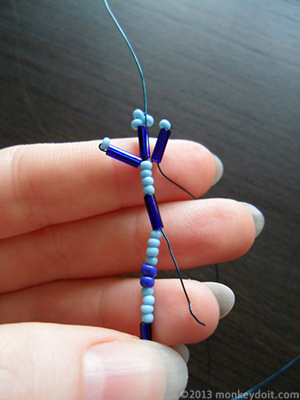
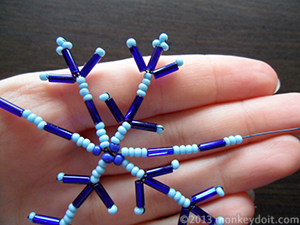
12. Create another arm of the snowflake at a right angle to the others following steps 3-11.
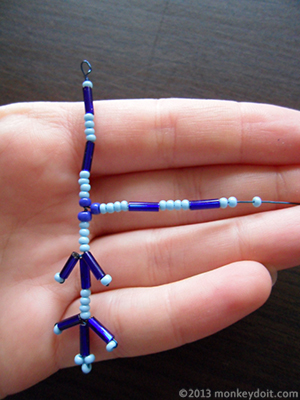
13. Repeat step 12 to create the fourth arm on the opposite side.
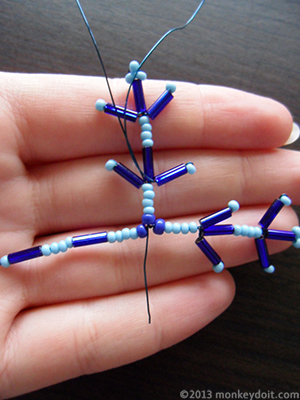
14. Wrap the wire around the centre of the snowflake and come out in between two of its arms. String the following sequence of beads onto the wire: four small seed beads, one bugle bead, four small seed beads, one bugle bead and three small seed beads.
15. Push the wire back through the bugle bead.
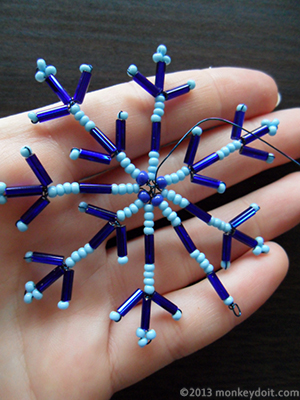
16. Repeat steps 5-7 and push the wire all the way back to the centre.
17. Create four more short arms in between the long ones repeating steps 14-16.
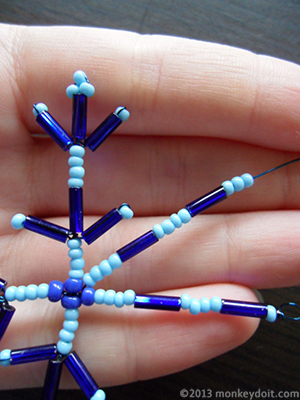
18. When you complete the last short arm, push the wire up the very first long arm you created until you come out just below the first bugle bead.

19. Perform steps 5-7 and push the wire up towards the next bugle bead.
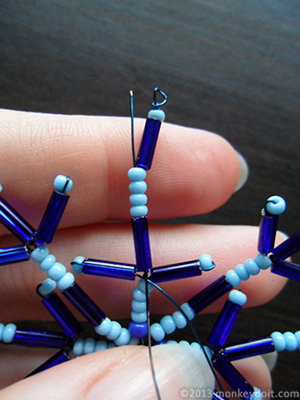
20. Repeat steps 5-7, bring the wire up through the bugle bead at the top and cut it as close to the bead as possible so that the tip is not sticking out.
If you're still reading this, it means you haven't lost your eyesight in the process of making the snowflake and you can see that it's not as symmetrical and straight as it should be. It might be a little wonky from all the pulling, pushing and twisting of the wire. If it is, just straighten the arms out a little bit (snowflake's, not yours) but don't obsess about it too much. According to Wikipedia, real snowflakes are never perfectly symmetrical so you can always say it's wonky for the sake of scientific accuracy. Remember you can modify the length and the number of arms with six being the minimum.
Related pages
Make a Beaded Christmas Star | Make a Snowflake Out of Beads | Make a Pasta Christmas Tree
![]() How To Make Diamond-shaped Earrings Out Of Beads
How To Make Diamond-shaped Earrings Out Of Beads
How to make diamond-shaped earrings out of beads using a Brick Stitch.
![]() How to Create a Bracelet with a Sliding Clasp
How to Create a Bracelet with a Sliding Clasp
Tutorial that shows you how to create a square knot sliding clasp for jewelry.
![]() How To Make A Dream Catcher For A Child
How To Make A Dream Catcher For A Child
Step-by-step instructions for how to make a Dream Catcher.
![]() Create a Fun Flower-Pot out of a Plastic Cup
Create a Fun Flower-Pot out of a Plastic Cup
A fun flower-pot project great with or without children.
![]() How To Make A Plastic Bottle Bird House
How To Make A Plastic Bottle Bird House
A simple bird house using a plastic bottle that costs next to nothing to make.