- MONKEYDOIT LINKS
- Home
- Beading & Jewelry Making
- Clay Basics
- Fun Paper Crafts
- Home Decor
- Projects with Fabric
- Easy Crafts For Kids
- Arts & Crafts Ideas
- Search
- OTHER SITES
- Sleewee
- Worklooker
- Jobspector
How To Make A Christmas Tree Out Of Pasta
by Joanna Ochocinska
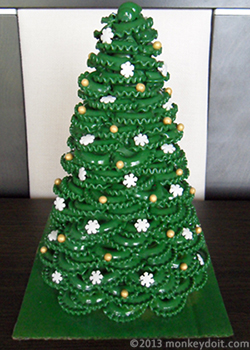
The perfect Christmas tree? All Christmas trees are perfect! (Charles N Barnard)
That might be true but a Christmas tree made out of pasta is not only perfect; it's also extremely, unimaginably, awesomely cool! Who would have thought you could make something so beautiful using the contents of your pantry and your kid's school supplies!? A pasta Christmas tree looks very professional and most people who see one for the first time find it difficult to believe it's handmade. In my experience, mastering the art of turning pasta into Christmas decorations makes you very popular with everyone and might even earn you some money. I once tried to organise a Christmas tree making workshop for children. I showed a pasta Christmas tree I'd made earlier to a group of parents and as a result, not a single parent sent their kid to the workshop; they all wanted to buy a pasta tree from me!Materials Needed To Make A Christmas Tree Out Of Pasta
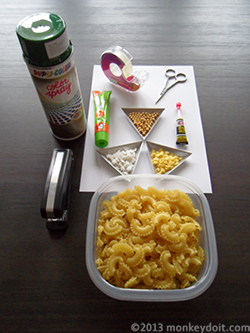
1. A4 sheet of cardboard
2. Pasta for the branches (creste di gallo)
3. Pasta for the tip (conchiglie)
4. Scotch tape
5. Stapler
6. Regular paper adhesive
7. Super glue
8. Scissors
9. Spray paint
10. Sugar cookie decorations/ beads
How To Make A Christmas Tree Out Of Pasta Step By Step
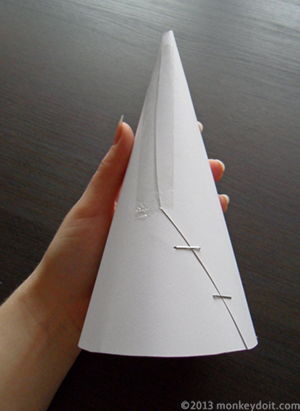
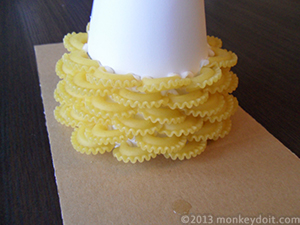
1. Form a cone out of cardboard. Secure the bottom with staples and the top with scotch tape.
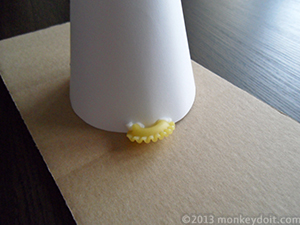
2. Apply a generous amount of paper adhesive onto the first piece of pasta.
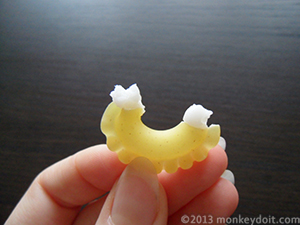
3. Stick it to the bottom of the cone horizontally.
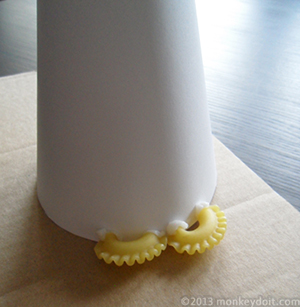
4. Place another piece of pasta right next to the first one.
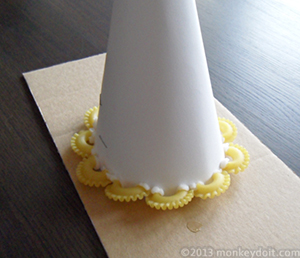
5. Continue attaching individual pieces of pasta until you make a full circle.
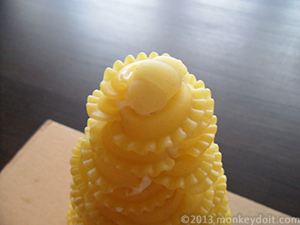
6. Begin the next row by placing a piece of pasta overlapping two pieces from the row below.
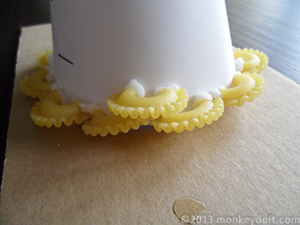
7. Repeat step 6 until you reach the top of the Christmas tree.
8. Top the tree off with a single piece of conchiglie.

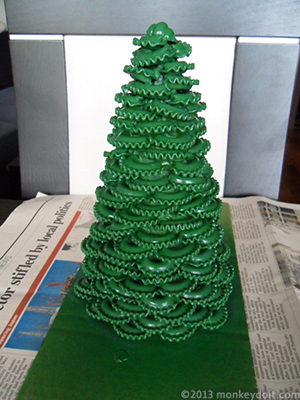
9. Spray paint the tree and let it dry for a couple of hours.
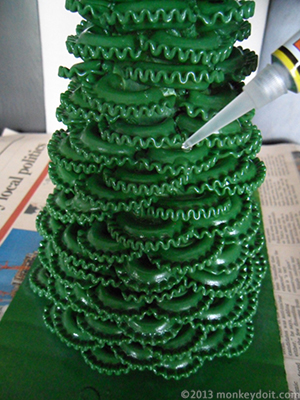
10. Attach the sugar decorations to branches with super glue.
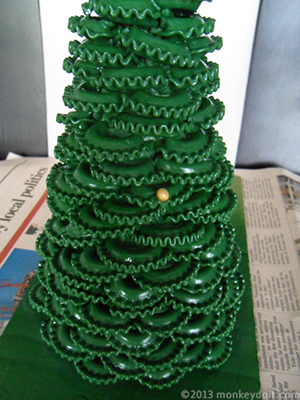
The Christmas tree I made is quite large. I suggest you start with something smaller and easier to handle. You can even halve the size of the cardboard used to make the cone. You could also modify the angle at which the tree branches out by making a cone with a wider base. How about a silver or a golden Christmas tree for a change? Let your imagination dictate what you use for the decorations; or better yet, get your children involved! This is not a complex project and it's a lot of fun so I'm sure they will enjoy it. You might want to supervise them when they spray paint the tree and use super glue unless you were planning to redecorate the house anyway.
Related pages
Make a Beaded Christmas Star | Make a Wire Snowflake | Make a Snowflake Out of Beads