by Hollie Strack
If you have children, you are probably the owner of several broken or worn down crayons that you don’t know what to do with, here is a fun way to up-cycle them into fun shaped multi-colored crayons. It is better than throwing them away and it is something the kids can help with.
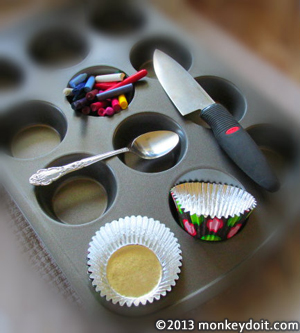
Step 1: Gather all the materials needed to create the crayons.
Step 2: Preheat oven to 140°F
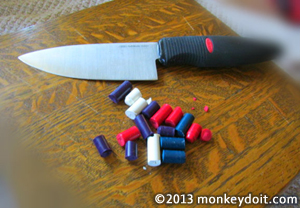
Step 3: Peel the paper off of your old Crayons; make sure you get all of it. Paper may not be easy to remove from crayons that have been sitting in the sun or a warm environment
Step 4: Cut crayons into small pieces. The pieces do not have to be the same size. If you would rather break them, this is something you could have your children help with.
Step 5: Line your cup cake pan with the foil liners. This is easy enough that the kids can also help with it.
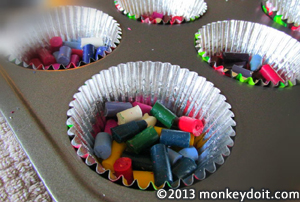
Step 6: Place crayon pieces into the baking tray, you can either use a variety of colors or create themes, such as different shades of blue and purple. Don’t fill them more than half-way with the pieces.
Step 7: Make sure your oven is fully preheated, and place the cup cake pan into the oven.
Step 8: Wait approximately 5 minutes - the time this takes will depend on how many crayon pieces, and their sizes into the liners.
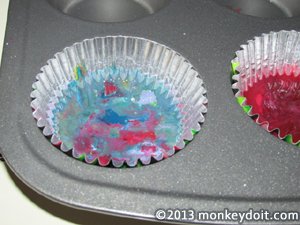
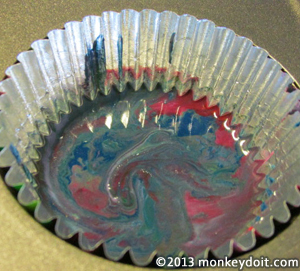
Step 9: Carefully remove the pan from the oven. Take a fork or a spoon to gently stir any crayons that didn’t quite mix together. Be careful not to over-mix as because you will end up with one solid color that may not be too appetizing.
Step 10: Allow the crayons to cool; this could take up to 15 minutes.
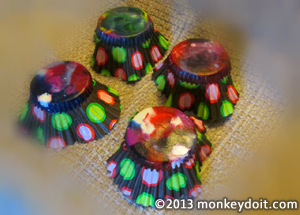
Step 11: Once the crayons have cooled completely you can remove the foil cup cake liners and they look like marled Reese Cups. I wouldn’t suggest eating them though.
It is always good to take time out to up cycle things when we can instead of just throwing them away, when they can be re-purposed to create new things. There are a plethora of different things we would generally throw away that can be used to create things such as flower pots, bags, candle holders, or storage containers. It is always a good idea to recycle or up cycle when you can. Not everyone is crafty, but for many things you don’t have to be. It might be a simple as poking a few holes in the bottom of a used butter bowl or cutting up an old towel.
Thanks & Happy Crafting!
Related pages
![]() How To Make Diamond-shaped Earrings Out Of Beads
How To Make Diamond-shaped Earrings Out Of Beads
How to make diamond-shaped earrings out of beads using a Brick Stitch.
![]() How to Create a Bracelet with a Sliding Clasp
How to Create a Bracelet with a Sliding Clasp
Tutorial that shows you how to create a square knot sliding clasp for jewelry.
![]() How To Make A Dream Catcher For A Child
How To Make A Dream Catcher For A Child
Step-by-step instructions for how to make a Dream Catcher.
![]() Create a Fun Flower-Pot out of a Plastic Cup
Create a Fun Flower-Pot out of a Plastic Cup
A fun flower-pot project great with or without children.
![]() How To Make A Plastic Bottle Bird House
How To Make A Plastic Bottle Bird House
A simple bird house using a plastic bottle that costs next to nothing to make.