by Hollie Strack
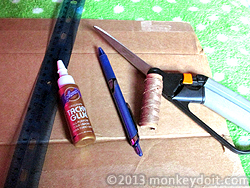
Creating a loom seems like a difficult and time consuming process. However, it’s actually quite simple and takes no more than an hour max. The great thing about creating your own loom is that you don’t have to worry about the expense of buying one, and you can create whatever shape or size you need. It also doesn’t take very many materials to create a loom. These instructions are specifically for creating a cardboard notebook but you can use it as a base to create a different cardboard loom as well.
Step 1:
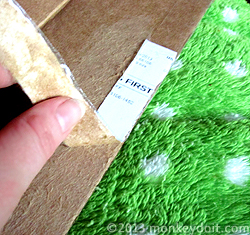
First you want to measure your cardboard to the desired size, and then make sure to peel away any stickers.
Step 2:
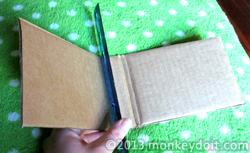
If you are creating a cardboard loom for a cardboard notebook, you will want to take a ruler to score a binding area in the center. It should be between ¾” and 1” wide; if not move on to step 3.
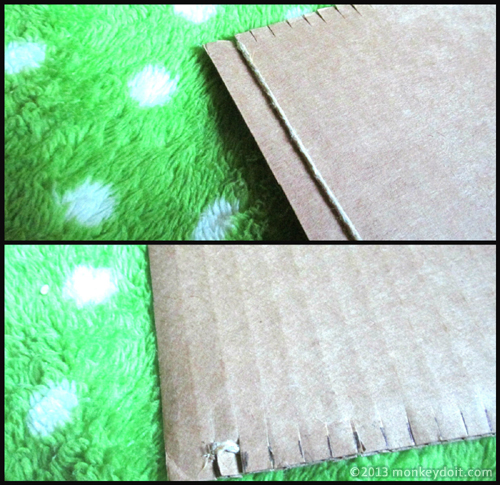
Step 3:
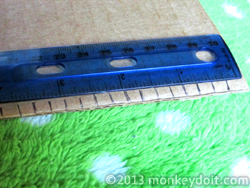
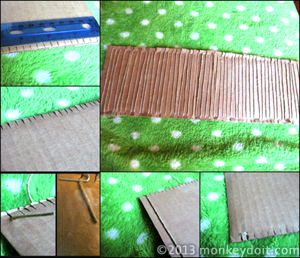
Measure and mark every ¼” on the top and bottom edges of your loom. You’ll want to make the marks wider if you are creating a larger loom for something like a rug.
Step 4:
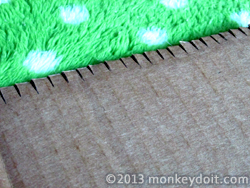
Cut where you made the marks, the cuts do not have to be perfect in length as long as they are the same distance apart. For thicker string you want to make the cuts a little deeper.
Step 5:
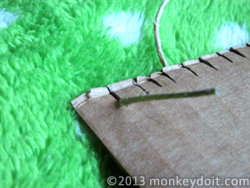
Leaving the string attached to its spool, insert the end of it into the first slit, making sure to leave a tail of approximately ¾”.
Step 6:
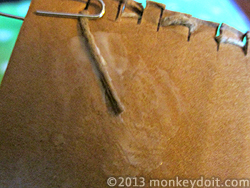
Glue down the “tail” using craft glue, and allow it to dry for at least 20 minutes. This side will be the back of the loom.
Step 7:
Run the string to the slit on the opposite side and loop it around to the second slit and back to the other side. Make sure you don’t wrap the cord completely around the loom.
Step 8:
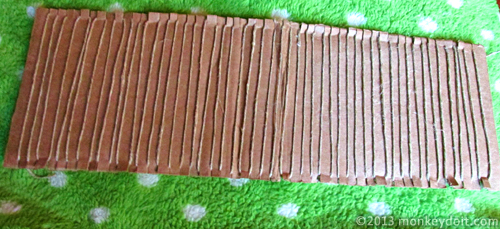
To finish your loom repeat step 7 until you reach the end of the loom, then cut the string from its spool, leaving ¾”. Don’t forget to glue it down to the back of the loom.
Related Pages
DIY: Fabric Covered Notebooks Made from Cardboard and Fabric Scraps
![]() How To Make Diamond-shaped Earrings Out Of Beads
How To Make Diamond-shaped Earrings Out Of Beads
How to make diamond-shaped earrings out of beads using a Brick Stitch.
![]() How to Create a Bracelet with a Sliding Clasp
How to Create a Bracelet with a Sliding Clasp
Tutorial that shows you how to create a square knot sliding clasp for jewelry.
![]() How To Make A Dream Catcher For A Child
How To Make A Dream Catcher For A Child
Step-by-step instructions for how to make a Dream Catcher.
![]() Create a Fun Flower-Pot out of a Plastic Cup
Create a Fun Flower-Pot out of a Plastic Cup
A fun flower-pot project great with or without children.
![]() How To Make A Plastic Bottle Bird House
How To Make A Plastic Bottle Bird House
A simple bird house using a plastic bottle that costs next to nothing to make.