by Carly Van Heerden
Instructions for making an amazing cardboard maze are provided below.
Mazes and labyrinths have long been used by ancient traditions as ways to cultivate patience. Labyrinths are usually large and some may even take the one walking through a few hours to reach the end. They traditionally consist of one very long path that folds alongside itself a number of times. There’s not much decision making required while walking a labyrinth, but seeing the end so close yet so far is ultimately a test of one’s patience!
The world’s largest labyrinth, built by Roland Esquivel, can be found in La Senda, Bolivia.
Mazes are more like a puzzle. They can be large enough to fill an entire garden, or small enough to fit on a game board on your coffee table. In a maze, the one walking through is faced with numerous alternative routes, but only one will lead them to the finish.
The world’s largest indoor maze can be found in the Gardens Shopping Mall in Dubai.
While following a line with a pencil along a page in a children’s activity book can be fun for children, having their own 3D maze to navigate through is far more exciting.
So, especially for children and parents who love a challenge, this article has been created to serve as a step by step guide on how to make your own Amazing Maze.
Be prepared as this project is certainly a tenacity tester. It will try your patience at times but if you never give up you will have learnt the lesson of patience, which after all is the purpose of a maze.
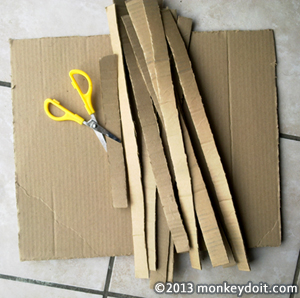
1. Begin by cutting a large square/rectangle from one of the sides of one of the boxes.
2. Cut some of remaining cardboard into thin strips as seen in the image below.
3. Using your pencil (you don’t want the lines to be too dark), map out your first line which will ultimately be the only path that reaches the finish successfully. From there, you can draw alternative routes using lines around your main route as seen in the image below.
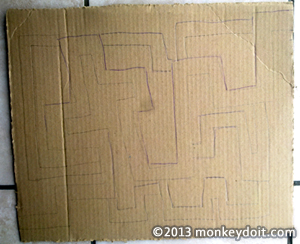
As you begin to work on the maze you may find that you work outside of these lines. This will be fine. The lines will merely serve as a guide. Keep in mind that the paths must be ‘tunnel-like’ - you won’t be laying down one line of cardboard, you will be laying down two lines to make the tunnels.
4. Starting at the top of your maze, cut your prepared thinner strips of card into specific lengths according to the lines you have drawn on your cardboard surface. Start off with only a few, then continue as you see fit. You may find one line is longer than necessary or that you need to add or remove an extra line/wall. As mentioned previously, you won’t need to strictly adhere to the lines.
5. Pierce holes into the surface cardboard, and then line the holes up with holes in the underneath of each thin strip of cardboard. Break your toothpicks or kebab skewers into smaller sticks, and then pierce the sticks into the measured thin cardboard strips, as seen in the image below.
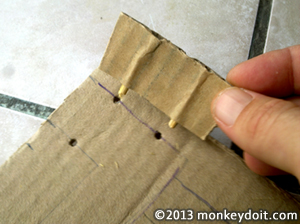
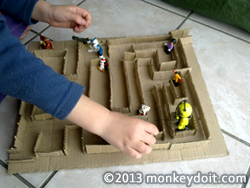
6. Place the sticks protruding from the thin cardboard strips into the holes on the cardboard surface, joining the walls to the surface.
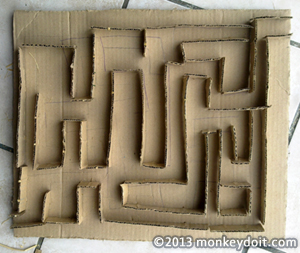
7. Continue this way, creating your tunnels, until you have completed your 3D maze.
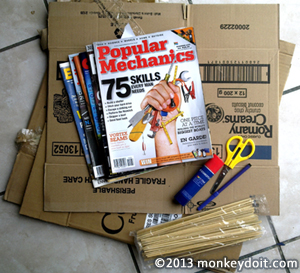
8. From here, if your child doesn’t want to use his/her own figurines (like Lego) you can make figurines by cutting characters out of magazines. Stick the character cut-out to a piece of cardboard with the school glue then cut away any card around the edges of the cut-out character. Pierce a toothpick into the bottom of the cardboard figurine, so that you can place the figurine onto the surface of your maze.
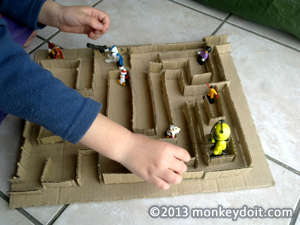
The great thing about this maze is that the route to the final destination does not always have to be the same. For fun, when your child is not looking, you could simply remove a wall or two. When your child returns thinking they know the way, they will suddenly see that certain walls are missing and they will have to work out the way to the finish from scratch again!
As mentioned previously. This is not a quick project. It will take some time to complete. But once it’s done you will feel as though you’ve accomplished so much, and your children will have a new game to play that cost less than $2.00.
However, after all the time you’ve put into it, should it break - the feelings you may feel might well be likened to those you would feel if your child broke a toy that cost $200.00!
But in the end it’s all about spending time together. Have fun!
Related Articles
Build A Castle With Cardboard Boxes | How To Craft Minecraft Style Using Cardboard | See More Fun Projects for Children
![]() How To Make Diamond-shaped Earrings Out Of Beads
How To Make Diamond-shaped Earrings Out Of Beads
How to make diamond-shaped earrings out of beads using a Brick Stitch.
![]() How to Create a Bracelet with a Sliding Clasp
How to Create a Bracelet with a Sliding Clasp
Tutorial that shows you how to create a square knot sliding clasp for jewelry.
![]() How To Make A Dream Catcher For A Child
How To Make A Dream Catcher For A Child
Step-by-step instructions for how to make a Dream Catcher.
![]() Create a Fun Flower-Pot out of a Plastic Cup
Create a Fun Flower-Pot out of a Plastic Cup
A fun flower-pot project great with or without children.
![]() How To Make A Plastic Bottle Bird House
How To Make A Plastic Bottle Bird House
A simple bird house using a plastic bottle that costs next to nothing to make.