- MONKEYDOIT LINKS
- Home
- Beading & Jewelry Making
- Clay Basics
- Fun Paper Crafts
- Home Decor
- Projects with Fabric
- Easy Crafts For Kids
- Arts & Crafts Ideas
- Search
- OTHER SITES
- Sleewee
- Worklooker
- Jobspector
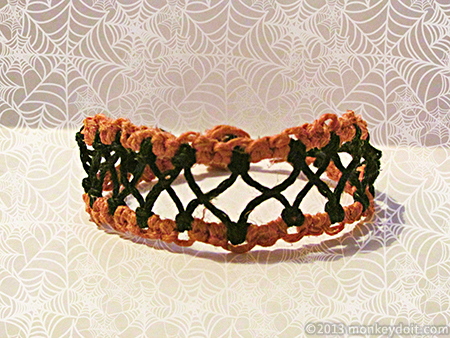
How to Create an Awesome Halloween Themed Bracelet
by Hollie Strack
Many people say that winter is the season of giving, but I disagree. People give the most freely on Halloween night. People have become quite creative with what they give to trick-or-treaters and are no longer just giving out candy. Usually I put together Halloween bags containing several items for the kids in my neighborhood and pass them out. This year I will be passing out Halloween themed bracelets in the bags, and of course, tons of candy and other fun little treats (or tricks).
Materials needed for Halloween Bracelet:
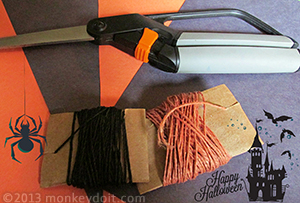
1. Two different colors of hemp (I used orange and black
)
2. Scissors
Knots used in this Project:
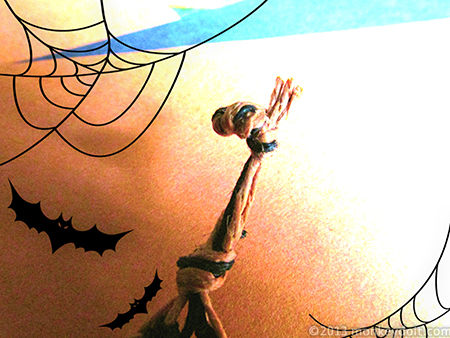
How to create a Halloween themed bracelet
1. Cut 3 pieces of hemp of the same length - if you are making these for children the un-knotted hemp should measure between 20” - 25”. The finished product will measure approximately 4” or 5”. These can be made custom by measuring the person’s wrist, then multiplying the measurement by 5.
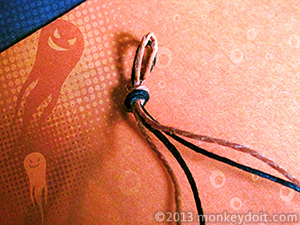
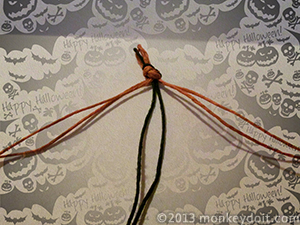
2. Fold all three cords in half and create an overhand knot. Make sure to leave room for the finishing knot to fit through the hole.
3. Separate your cords into 3 sets, orange on either side and black in the center or vice versa.
4. Create 3 vertical larks head knots with the orange cords on both sides. Don’t knot the black cords yet.
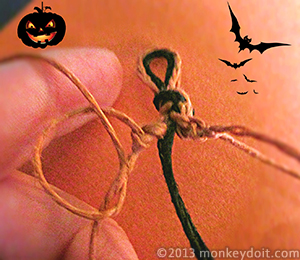
5. Once you have created the vertical larks heads knots on either side, take the black cord from the opposite side and create a vertical larks head knot using the same orange anchor cord for the original knots. Do the same with the other black cord.
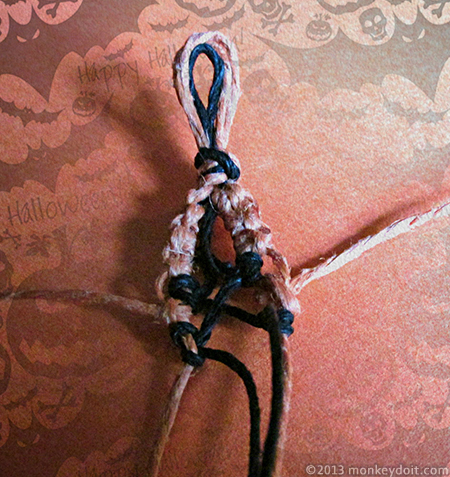
6. Repeat this until you come close to the end of the cord. It should create a crisscross pattern down the center of the bracelet.
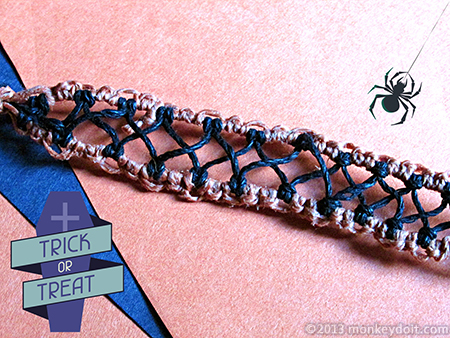
7. When you come to the end of the cord, create an overhand knot, leave a little space, and then create a second overhand knot. The second knot is your finishing knot.
**Note about Vertical larks Head knots**
Like Square knots, vertical larks head knots are actually 2 knots. The first knot should go under the anchor cord and the second should go over it. If you only create half of the finished knot it may not hold correctly, leading to issues with unraveling.
As stated in my previous posts, if you find that the jewelry is especially itchy and stiff; just pour boiling water over the piece and let it sit for 5-10 minutes. Do not do this if you have included plastic beads in your piece.
Feel free to use different colors, and sizes of hemp for this project. Also, you can add Halloween themed beads to make it a little more decorative. I didn’t happen to have anything Halloween themed as far as beads went so I didn’t add any. Also, because I am handing these out for Halloween and have a limited budget I didn’t want to spend tons of money.
Good Luck & Happy Crafting! Oh & Happy Halloween!
Related
Easy Halloween Book Pumpkin Decoration | Create a Beautiful Hemp Friendship Bracelet | Create a Hemp Bracelet with a Sliding Clasp