- MONKEYDOIT LINKS
- Home
- Beading & Jewelry Making
- Clay Basics
- Fun Paper Crafts
- Home Decor
- Projects with Fabric
- Easy Crafts For Kids
- Arts & Crafts Ideas
- Search
- OTHER SITES
- Sleewee
- Worklooker
- Jobspector
How To Make A Tubular Bracelet Out Of Beads
by Joanna Ochocinska
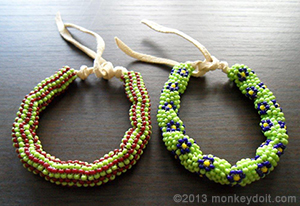
You can make amazing things out of beads but the bracelet we’re going to make in this tutorial is probably the most amazing of them all. To accomplish this feat of beadwork we will be using a Peyote Stitch. It owes its name to Native American Peyote ceremonies performed with the use of objects decorated with this stitch. This weaving technique is awesome; if there ever was an awesomeness and beauty pageant for stitches, Peyote Stitch would win without even showing up. That’s because it’s incredibly versatile. You don’t need a loom or any specialised equipment for it. You can weave pieces of any shape and size using this method: flat, rectangular, round as well as tubular. They can be sawn on as decorative elements or function as independent pieces of jewellery: bracelets, earrings, pendants, brooches, etc. The piece described in this article is hollow inside which is not only incredibly cool but also very practical. It means you can choose what it can wrap around (if anything) or whether you want it to be ‘puffed up’, twisted or slightly flattened. It also leaves your options open as to what kind of clasp you want to use.
That’s the good news... The not so good news is that this beading technique is challenging and time-consuming; but how boring would life be without challenges? The stitch itself is not so complicated but it will require a lot of concentration on your part. In fact, it displays some typical features of an attention seeker: if you don’t fully concentrate on the stitch, it will play a nasty trick on you or throw a tantrum.
A few notes before we start:
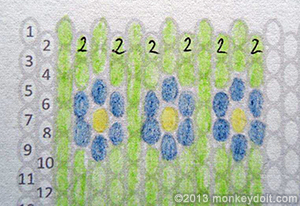
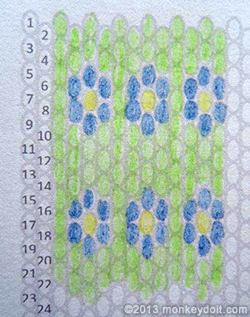
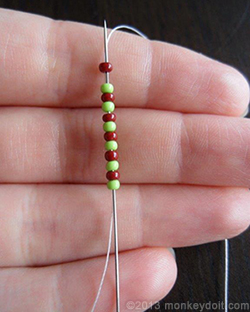
- You can make your bracelet as wide as you want. However, if this is your first attempt and if you want to finish the bracelet before the summer of 2023, I recommend sticking to 12 beads as in the example shown below.
- In order to illustrate the technique better, the photos show how to make a simplified striped pattern, not the floral design I have chosen for the bracelet.
- It’s possible to ‘get lost’ in the design and get confused as to which bead to string next. For your convenience the rows on the graph paper have been numbered. Try to remember which row you’re working on. Notice how far away from each other the beads in each row are.
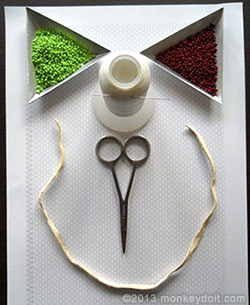
Materials Needed To Make A Tubular Bracelet Out Of Beads
1. Seed beads (at least 2 different colours)
2. Thread
3. A needle
4. Scissors
5. A leather strap, string or thong long enough to tie around your wrist
6. Peyote Stitch graph paper (click here to download printable version)
How To Make A Tubular Bracelet Out Of Beads Step By Step
1. Draw your design on the Peyote Stitch graph paper or just follow the simplified pattern.
2. Cut a length of thread you’re comfortable working with.
3. Thread a needle.
4. String 12 beads or any even number of beads onto the thread and push them down to a few centimetres from the end of the thread.
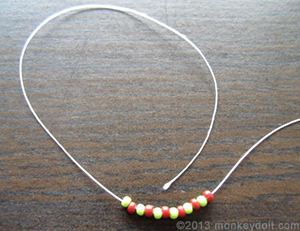
5. Push the needle through all the beads starting from the first one and pull to make a loop.
6. Tie the two thread ends together.
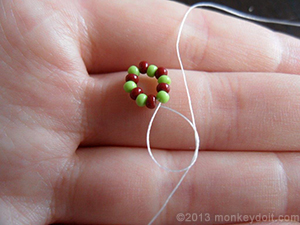
7. Bring the needle through the bead closest to the knot.
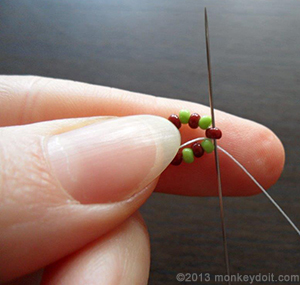
8. String the first bead of the second row onto the thread.
9. Skip one bead of the initial row and slide the needle through the next one along.
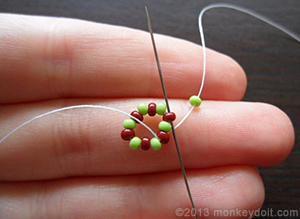
10. Repeat step 8, bringing the needle through every second bead of the first row until you make a full circle. Then, pass through the first bead of the second row.
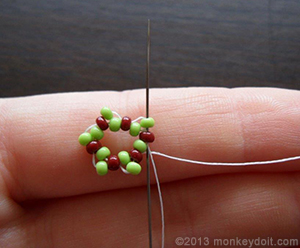
11. Pull on the thread to lift the beads of the second row. They should be stacked on top of the first row.
12. Slip one bead of the third row onto the needle.
13. Go through the second bead of the second row.
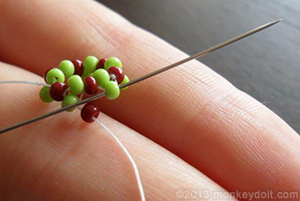
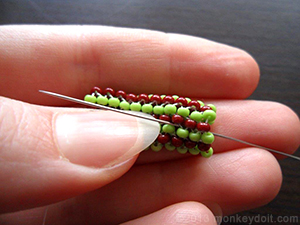
14. Repeat steps 12 and 13 until you reach the required length of your bracelet. The beads you need to push the needle through always stick out a little bit so recognising them shouldn’t be a problem. If you’ve chosen a complicated design, you might be confused as to where one row ends and another begins. Remember that every row you add is slightly elevated compared to the previous one so, whenever you reach a point where the two beads in front are higher, it means you’ve made a full circle.
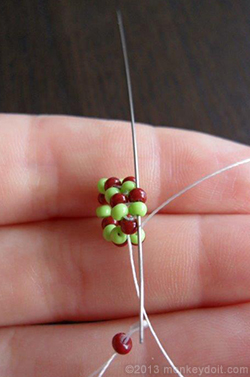
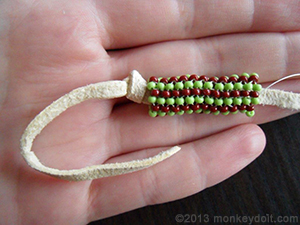
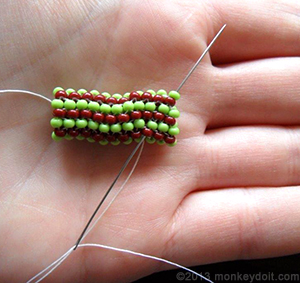
15. After you complete several rows, you might want to slide the leather strap through. Don’t wait until the bracelet is very long as it’s going to be more difficult to push anything through. Alternatively, you can use a piece of string or hemp to make a sliding clasp.
16. Secure one end of the strap with a knot. When you complete the whole bracelet, do the same with the other end of the strap.
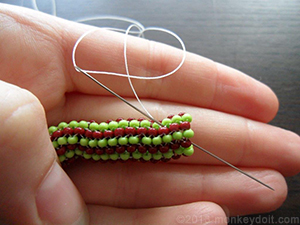
17. When you reach the end of the last row, make a double knot at the base of the nearest bead.
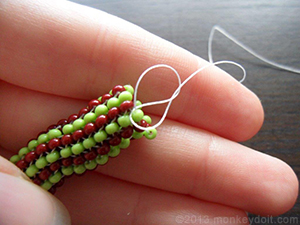
18. Bring the needle up through a couple of beads to bury the knot inside.
19. Push it down inside the tube and cut the end.
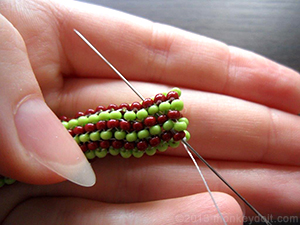
Adding Thread
1. When you run out of thread, follow steps 17-19 to secure its end and bury the knot.
2. Thread the needle again and secure the thread with a knot.
3. Push the needle up in between the beads a couple of rows from the one you were working on. Don’t pull on the thread too much; you want the knot to stay hidden inside the tube.
4. Bring the needle diagonally through the beads until it comes out where you left off.
When you feel comfortable with this weaving technique, you can go crazy with your designs and create really beautiful pieces of jewellery. I know for a fact that it becomes addictive and you might want to decorate everything around you - embellished pencil anyone? Go for it! The stitch is very strong yet flexible so you don’t have to worry about it falling apart any time soon. I wouldn’t go so far as to call it childproof but Peyote Stitch pieces will definitely survive more close encounters with your kids than your regular jewellery.
Good luck and have fun :-)
Related Articles
Make A Woven Bracelet Out Of Beads | Make A Floral Chainlet / Bracelet Out Of Beads