- MONKEYDOIT LINKS
- Home
- Beading & Jewelry Making
- Clay Basics
- Fun Paper Crafts
- Home Decor
- Projects with Fabric
- Easy Crafts For Kids
- Arts & Crafts Ideas
- Search
- OTHER SITES
- Sleewee
- Worklooker
- Jobspector
How To Make A Woven Bracelet Out Of Beads
by Joanna Ochocinska
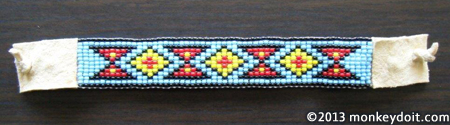
The first time I saw a similar bracelet, I was so puzzled by how all the beads hold together I decided it had to be magic. It was the same sort of bewilderment I experienced whenever I opened my high school chemistry course book. It turned out I was wrong about one of these things; the bracelet is actually really easy to make. Chemistry, however, remains a mystery.
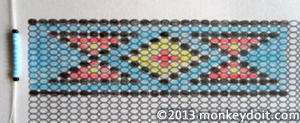
The bracelet is woven on a loom. It’s difficult to pinpoint the origin of this technique but, without a shadow of a doubt, it was perfected by American Indians who have produced some of the most beautiful beadwork using this method. That’s why, whenever I make a woven bracelet, I turn to Native American designs for inspiration. The square stitch used when weaving on a loom has its limitations; the patterns you create cannot be rounded or curved so my bracelets usually consist of abstract angular shapes. It’s also possible to weave someone’s name or date of birth (or PIN number if you’re forgetful). Of course, the wider the bracelet, the easier it is to fit in various shapes and objects.
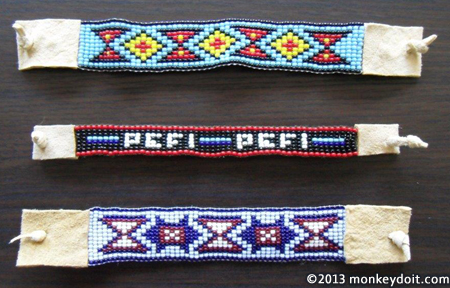
When it comes to choosing the colours for your bracelet, it's best to avoid using more than 4. Contrasting colours look great but I also encourage you to try out different shades of the same colour; combinations of various shades of green or blue work really well.
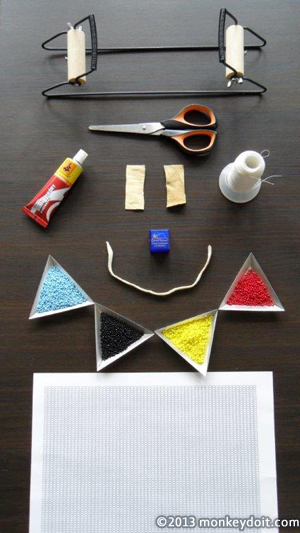
Materials Needed To Make A Woven Bracelet Out Of Beads
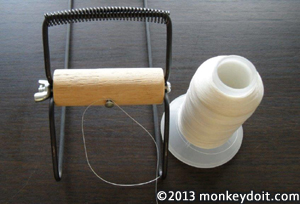
1. A beading loom - if you don’t have one, you can make it yourself by making small incisions on the sides of an old shoe box and attaching a pin underneath.
2. Seed beads of different colours
3. Scissors
4. Thread
5. Seed bead graph paper (click here to download printable graph paper PDF)
8. Two rectangular pieces of leather (4cm long and a bit wider than your bracelet)
9. 12-15cm long leather strap
10. (Optional) Thread conditioner or candle - If the thread becomes tangled at any point, just use the thread conditioner or rub some candle wax into it.
How To Make A Woven Bracelet Out Of Beads Step By Step
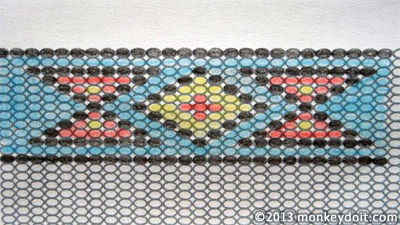
1. Create your own design by colouring in beads on the graph paper.
2. Tie one end of the thread to the nail on the dowel but don’t cut it yet.
3. Pull the thread across the loom through the grooves on each side and wind it around the other nail. This will be your first warp thread.
 |
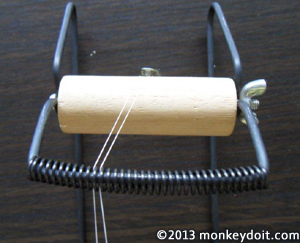 |
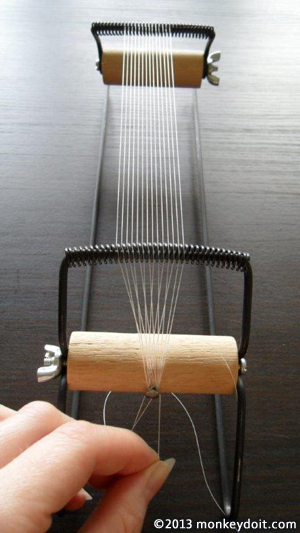
4. Repeat step 3 until you’ve reached the required width. There needs to be one more warp thread than the number of beads in one row of your bracelet.
5. Tie the thread to the nail on the dowel.
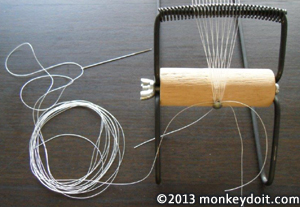
6. Cut a 2 metre piece of thread.
7. Thread the needle and tie the other end of the thread to one of the nails.
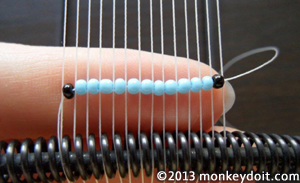
8. String the beads you will need for the first row of your design.
9. Place them underneath the warp threads and push the beads up so that they fit into the spaces between the warp threads.
10. Push the needle through the beads in the opposite direction but make sure this time it slides over the top of the warp threads.
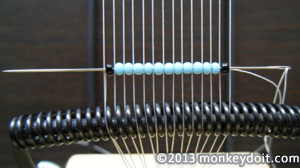
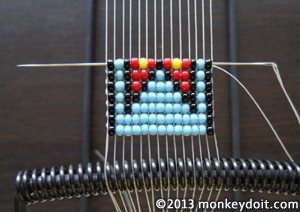
11. Now breathe, the difficult part is over :-) Repeat step 10 for every row of your design.
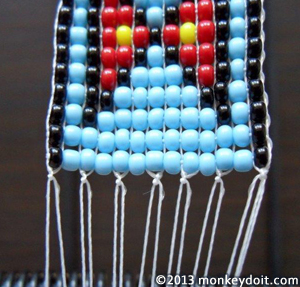
12. Cut all the warp threads on one side of the loom as close to the dowel as possible.
13. Secure the last row of the bracelet by tying neighbouring warp threads together.
14. Tie all the warp threads together in a knot and cut them just above the knot. You might need to borrow your neighbours’ kid at this stage - the smaller their hands, the better!
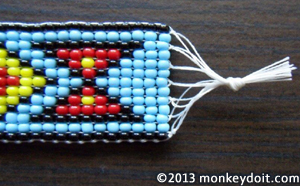
15. Repeat step 13 and 14 for the other end of your bracelet.
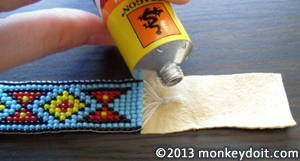
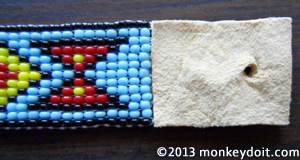
16. Glue the warp threads on each end to the leather rectangles.
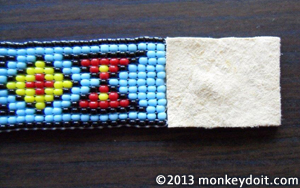
17. Fold the leather pieces in half and hold them together for a couple of seconds until they stick.
18. Make a small hole in each piece of leather. You can use your scissors or a leather hole punch tool if you have one.
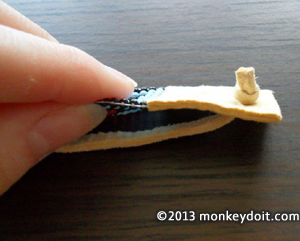
19. Pull a leather strap through the holes and secure each end with a knot.
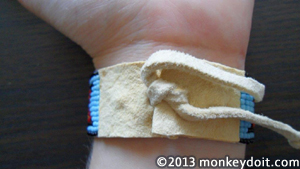
20. Pull each end of the strap to wrap the bracelet around your wrist and tie the strap.
OK, so I lied, the bracelet is not that easy to make. However, now that you’ve reached step 20, I’m sure you will agree it was worth it. I bet you look stunning with your new bracelet; so stunning that your partner might even look up from his computer!
Once you feel confident using a beading loom, you can expand your repertoire and experiment with wider, longer or shorter pieces of work. For instance, you can make a beautiful collar for your dog or cat. I’m sure your pet will appreciate it and might even reciprocate with a present of its own: a dead mouse or a soggy piece of something that used to be a toy. Bead woven pieces can also be sewn onto fabric or glued to hard surfaces as decoration so the possibilities are endless.
Have fun :-)
Related pages
How To Make A Floral Chainlet / Bracelet Out Of Beads