- MONKEYDOIT LINKS
- Home
- Beading & Jewelry Making
- Clay Basics
- Fun Paper Crafts
- Home Decor
- Projects with Fabric
- Easy Crafts For Kids
- Arts & Crafts Ideas
- Search
- OTHER SITES
- Sleewee
- Worklooker
- Jobspector
How To Make A Netted Choker Out Of Beads
by Joanna Ochocinska
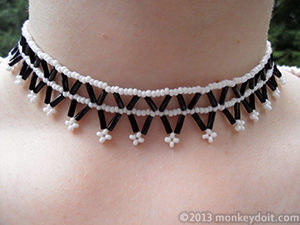
If bugle beads could talk, they would probably tell you that they want to be part of a netted choker. It just seems like the perfect habitat for them; the best place to reach their full potential and outshine all the other beads. A netted choker would also be their first choice because they would get to hang out at parties, gala dinners and dates with you as it would be your favourite piece of jewellery.
The key to success, as with many things in life, is simplicity. This choker consists of two contrasting colours combined in a simple pattern using netting technique described in my earlier articles on a netted bracelet and netted earrings. It’s easy and quick to make and doesn’t require any specialised beading equipment.
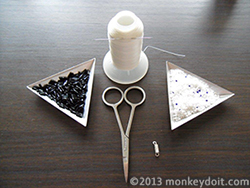
Materials Needed To Make A Netted Choker Out Of Beads
- Bugle beads
- Seed beads
of a different colour
- Thread
- A needle
- Scissors
- A clasp of your choice

https://amzn.to/2JxNA04
How To Make A Netted Choker Out Of Beads Step By Step
1. Cut a 2metre piece of thread.
2. Thread a needle.
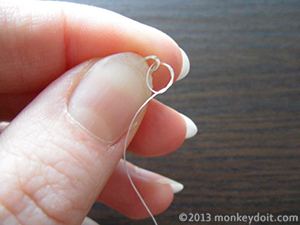
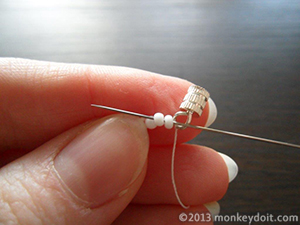
3. Tie one end of the thread to the clasp with an overhand knot
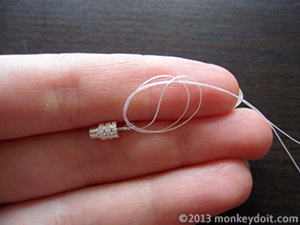
4. String enough seed beads to wrap around your neck (it has to be a multiple of 7 + 2 beads at the end).
5. Tie the other end of the thread to the second element of the clasp.
6. Go back through the last two seed beads.
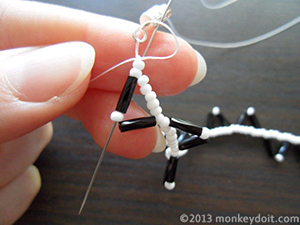
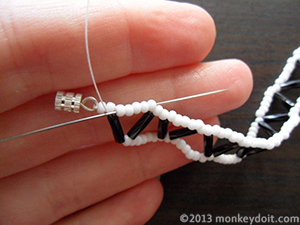
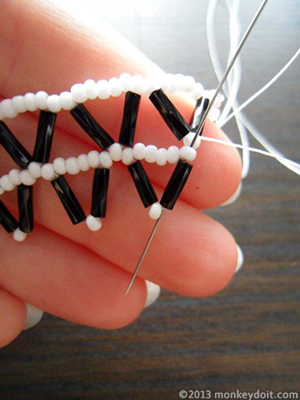
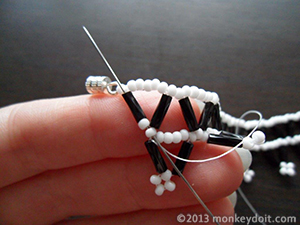
7. Put one bugle bead, one seed bead and a bugle bead onto the thread.
8. Skip 5 seed beads and push the needle through the 6th and 7th bead.
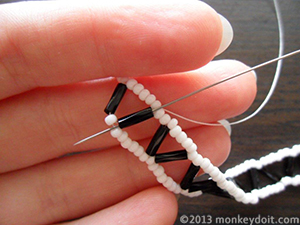
9. Repeat steps 7 and 8 until you reach the other end of the chain.
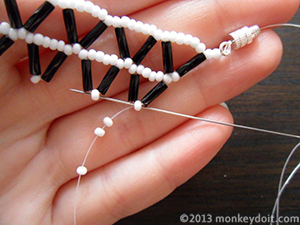
10. Slide the needle through the clasp and then push it back through the first 2 seed beads, the bugle bead and the seed bead at the tip of the first chevron.
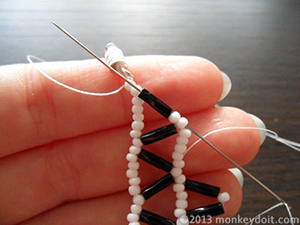
11. String 6 seed beads onto the thread and push the needle through the tip of the next chevron.
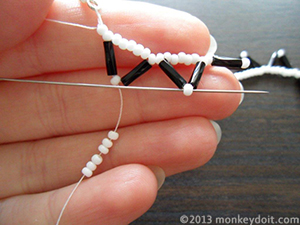
12. Repeat step 11 until you reach the last chevron.
13. Go up through the last bugle bead.
14. Slide the needle through the five beads in between the bugle beads.
15. Bring the needle down through the closest bugle bead.
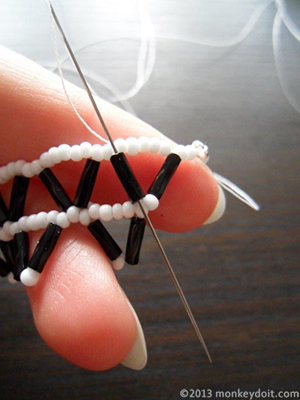
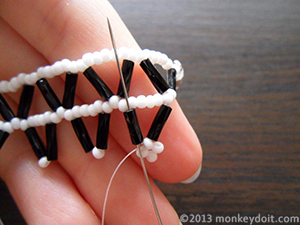
16. Go through the second seed bead from the bottom row.
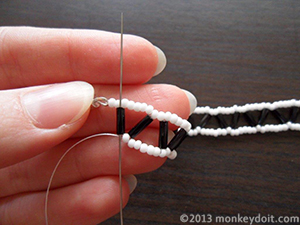
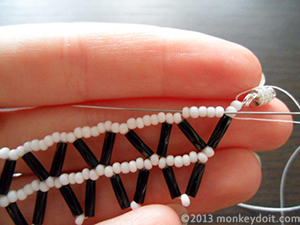
17. String one bugle bead, one seed bead and one more bugle bead onto the thread.
18. Skip 4 seed beads and push the needle through the next 3 seed beads so that the tip of the chevron above is in the middle.
19. Repeat steps 17 and 18 to complete the row.
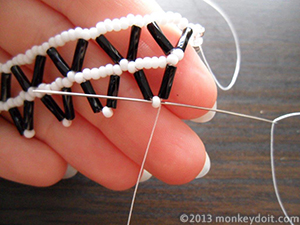
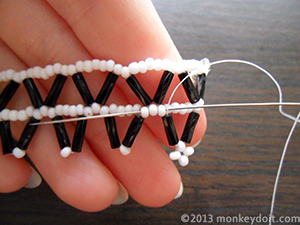
20. Go up through the bugle bead.
21. Push the needle back through 5 seed beads.
22. Bring the needle down through the closest bugle bead.
23. Push it down again through the seed bead and the bugle bead below.
24. Slide the needle through the seed bead at the tip.
25. String 3 seed beads and make a loop by pushing the needle back through the same bead as in step 24.
26. Move up through the next bugle bead.
27. Go through 3 seed bead towards the next chevron.
28. Push the needle down through the bugle bead.
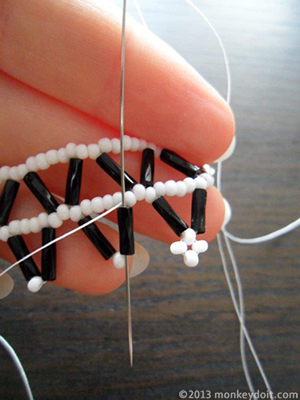
29. Repeat steps 24-28 to decorate all the remaining chevrons.
30. Tie a knot around the intersecting threads.
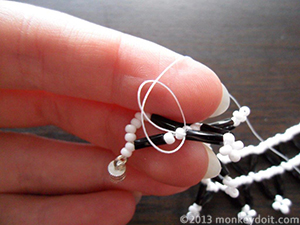
31. Weave the thread through several beads to bury the knot and cut the thread.
Don't be afraid to experiment with the pattern! Once you get the hang of this technique, you can modify the steps: increase or decrease the angle between bugle beads by adding or reducing the number of seed beads in between; add more rows; attach fringe to the tips of the chevrons or a pendant in the middle. Don't go overboard with the embellishments though; you're not decorating a Christmas tree here! Whatever decoration you're adding, remember to stick to the same combination of bugle and seed beads that you used on the main piece.
Get creative and have fun :-)
Related Articles
How To Make A Netted Necklace Out Of Beads | How to Make a Netted Bracelet | How to Make Netted Earrings