- MONKEYDOIT LINKS
- Home
- Beading & Jewelry Making
- Clay Basics
- Fun Paper Crafts
- Home Decor
- Projects with Fabric
- Easy Crafts For Kids
- Arts & Crafts Ideas
- Search
- OTHER SITES
- Sleewee
- Worklooker
- Jobspector
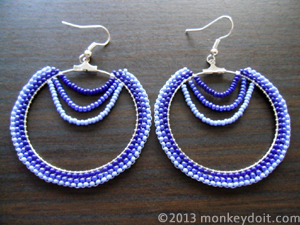
How To Decorate Hoop Earrings With Beads
by Joanna Ochocinska
Earrings are like chocolate. You can never have enough. Unlike chocolate, however, earrings don’t make you fat and for that reason they might be considered even better than chocolate. If you agree with me but you’re having trouble financing your earring addiction, here is a cheap solution to your problem. Instead of buying new earrings, you can decorate the ones you have and give them a new life! Then you can go and spend the money you saved on shoes :-)
Compared to other beading projects, this one is relatively easy and not very time consuming. In fact, you might already be familiar with the Brick Stitch we will be using on this project if you’ve made diamond-shaped earrings or beaded earrings with fringe. Therefore, if you are one of those people who can do two things at once (i.e. a woman), you will be able to work on your earrings while watching TV or listening to a lecture (and possibly taking notes at the same time).
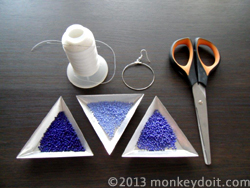
Materials Needed To Decorate Hoop Earrings With Beads
- Seed beads
of different colours
- Thread
- A needle
- Hoop earrings
- Scissors
How To Decorate Hoop Earrings With Beads Step By Step
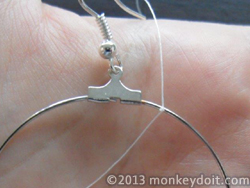
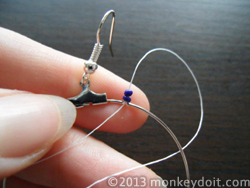
1. Cut a 1,5m piece of thread.
2. Tie one end of the thread to the hoop and thread the needle.
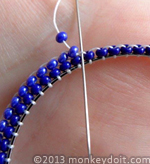
3. Slip one bead onto the needle and slide it all the way down to the knot.
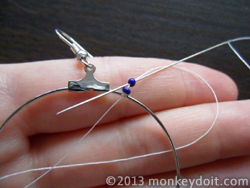
4. Wrap the thread around the hoop and bring the needle up through the bead.
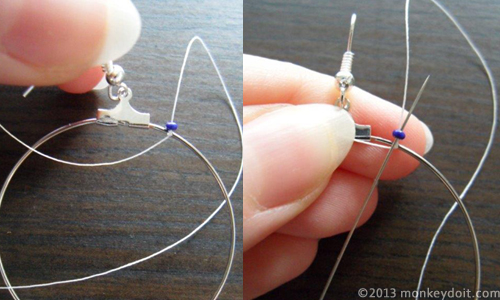
5. String another bead onto the thread and push it down.
6. Make another loop with the thread around the frame of the earring.
7. Push the needle through the newly added bead towards the preceding bead.
8. Repeat steps 5-7 until you go around the entire hoop.
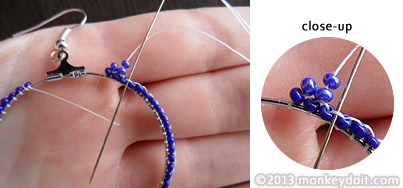
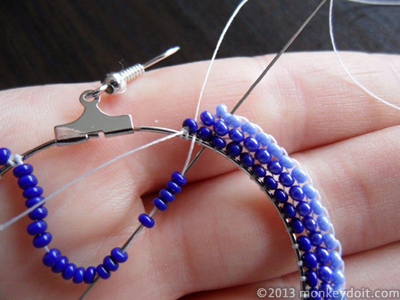
9. String two beads of a different colour and push the needle underneath the second thread bridge connecting the beads underneath.
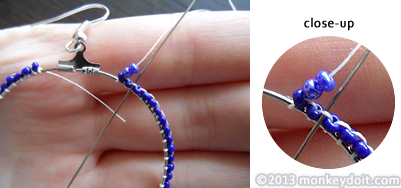
10. Bring the needle up through the second seed bead you’ve just added.
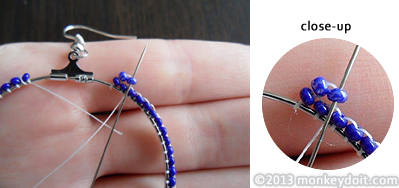
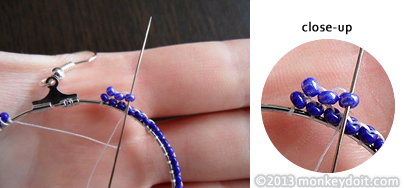
11. String a single bead onto the thread and slide the needle underneath the next thread bridge connecting the beads at the bottom.
12. Push the needle back up through the newly added bead.
13. Keep adding beads one by one repeating steps 11 and 12 until you reach the end of the row.
14. Keep adding rows on top the same way. Remember to add two beads at once at the beginning of each row and then single beads for the remainder of the row.
15. When you finish adding rows, weave the thread back through the beads all the way to the frame of the earring.
16. Tie a double knot on the inside of the hoop.
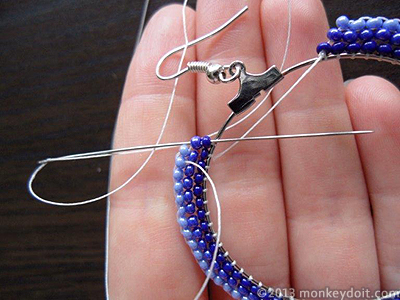
17. String as many beads as you need to connect the opposite sides of the hoop and add a few more to make the thread loose.
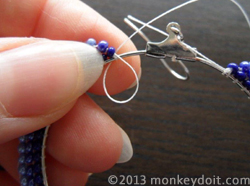
18. Wrap the thread around the wire.
19. Push the needle back through all the beads.
20. Repeat steps 17 - 19 until you’re satisfied with the effect.
21. Tie a knot around the base of the closest bead.

22. Weave both ends of the thread through a couple of beads to bury the knots and cut as close to the beads as possible.

When adding the outer rows you will notice that beads seem to be shifting sideways and they’re not aligned with the thread bridges underneath as they should. Whenever that happens, all you need to do is attach two beads to the same thread bridge and then continue as normal. You may have to repeat this step a couple of times. Another way of counteracting this is using beads that are one size bigger for the outer rows.
What’s great about this method is that you can use it to decorate pretty much anything that has a frame you can attach beads to: hairpins, rings, straps, brooches, key rings or paperclips. Although, why would you want to decorate your paperclips?! You can also decorate a hoop or a loop on the inside [see the example below]. If you choose this option, you will find that the more rows you add, the more crammed the beads will be. In that case, you will need to skip one thread bridge when adding a new bead.

Related pages
How To Make Diamond-shaped Earrings Out Of Beads | How To Make Beaded Earrings With Fringe